Thursday 21 March 2013

Textured Portrait in Photoshop (Composite Images)

This was a worthwhile exercise, taking in the combined skills of studio lighting, knowledge of portraiture, identifying and photographing textures, and the tools picked-up to set me in good stead for producing a quality montage for Unit 27. For this reason, you might like to think of this post as an introduction to Unit 27. Below is the finished textured portrait, followed by an in-depth break-down of how I made it possible.

The Portrait

I chose Bezma as my model because of her captivating eyes and youthful look. I shot her in the studio, using two soft boxes at either side of my subject (see below for set-up). I was rather pleased to discovered at this point that my Metz AF 50 flashgun was able to trigger these two lights, meaning I did not have to attach the trigger. People were rushing me so they could shoot their own portraits, but this only brought out the best in me. Below is the image I chosen straight from camera without any editing followed by the one edited using Adobe Camera RAW and the main Photoshop.

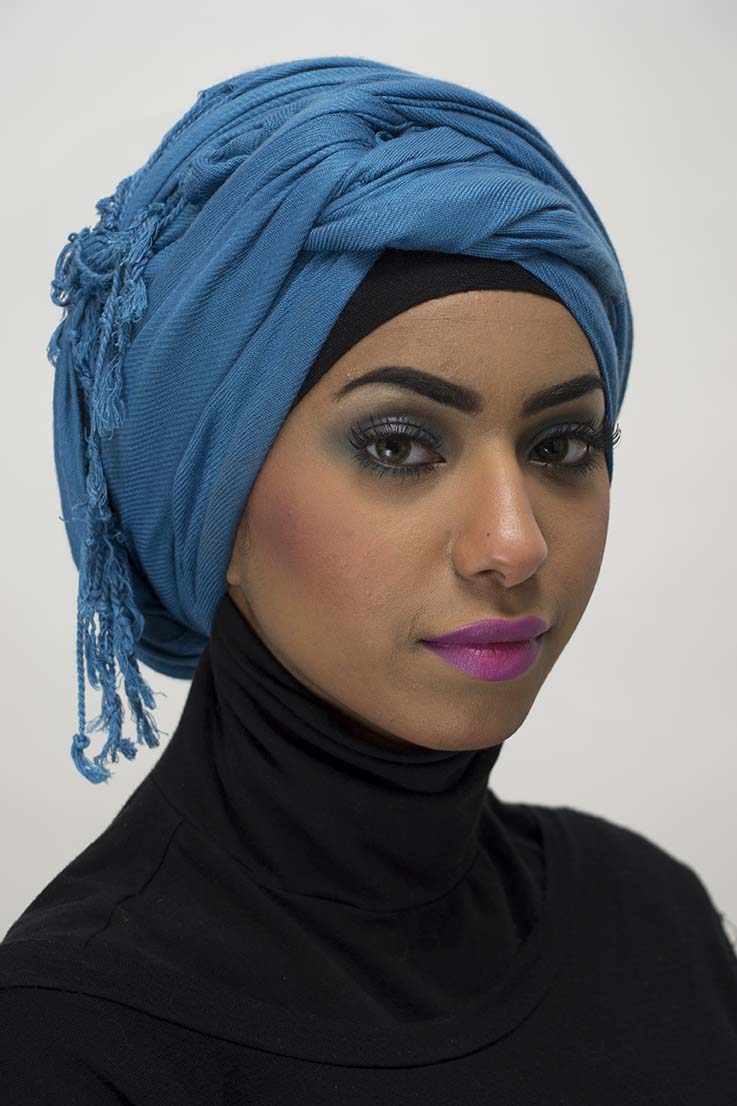
f5.6, 1/60th, ISO100, 62mm, Auto White Balance, Spot Metering.
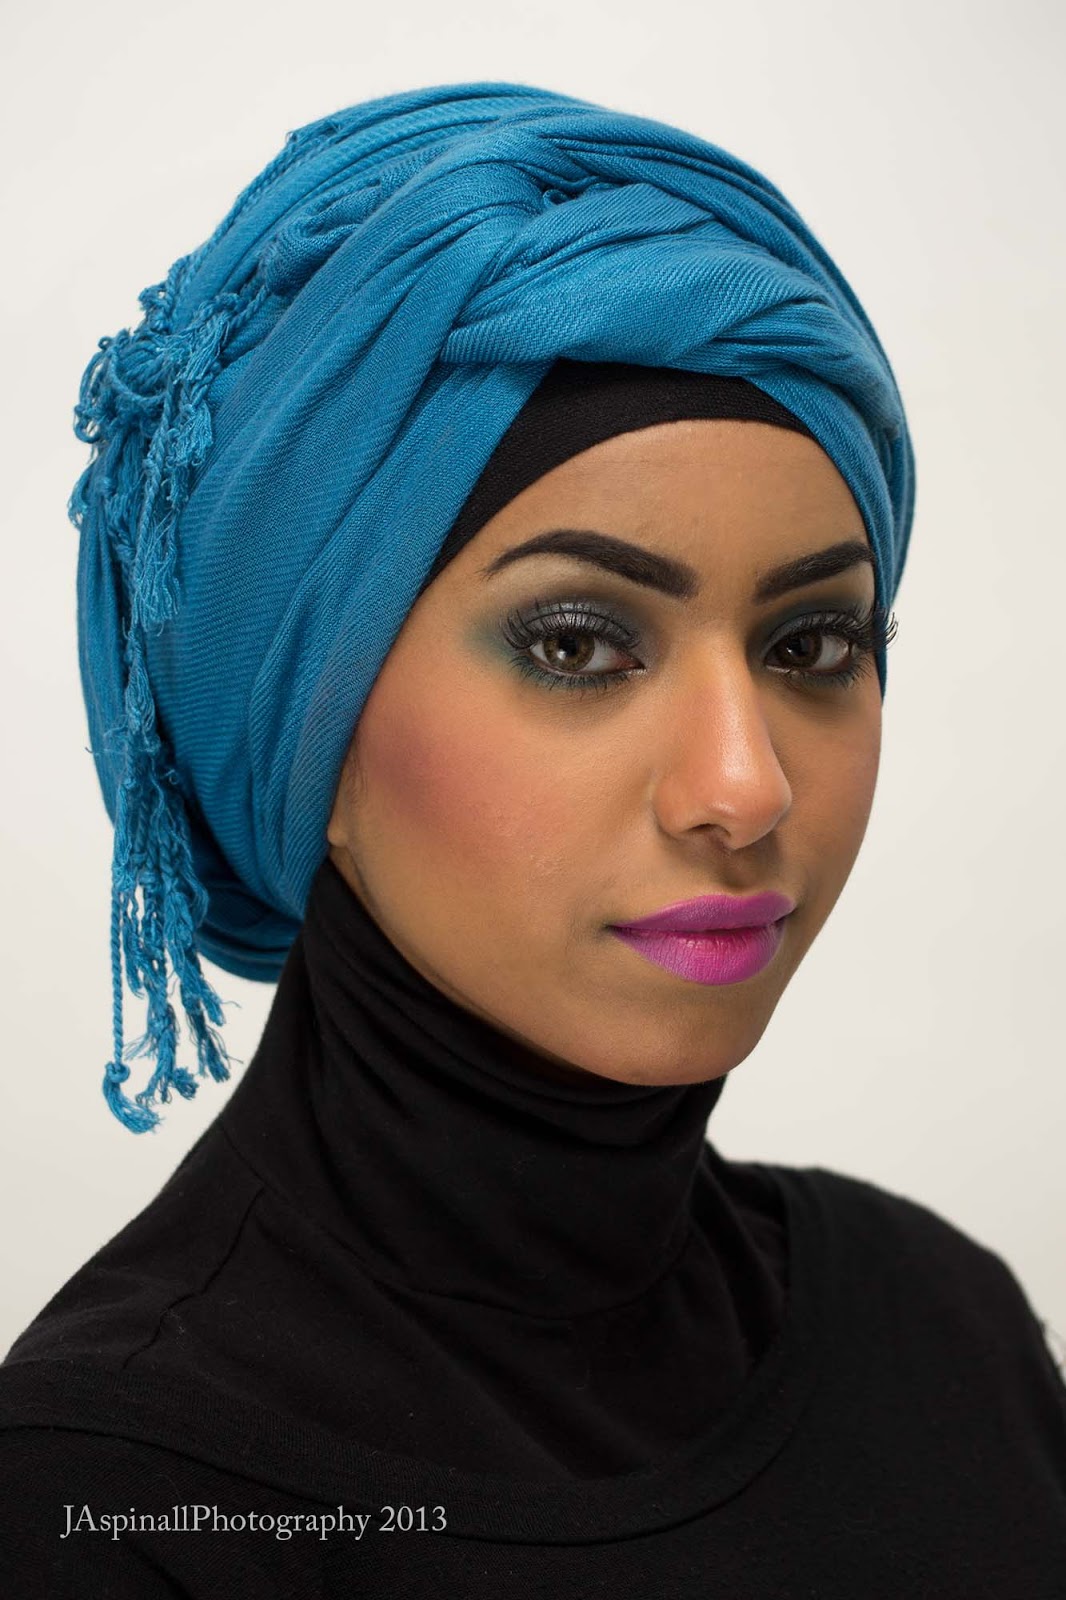
Increased exposure, lights, highlights and contrast in the main. These are the things I use most often in ACR,. I like the way Lights compliments the actual lights used in the studio. It is basically a fill-light. In CS6 I used the Spot Healing tool to remove any blemishes from Bezma's skin, before adding my usual Guassian Blur Filter with a black mask to soften her skin. The last thing I usually do is use the Sharpen tool to very subtly sharpen the eyes. Less is more.

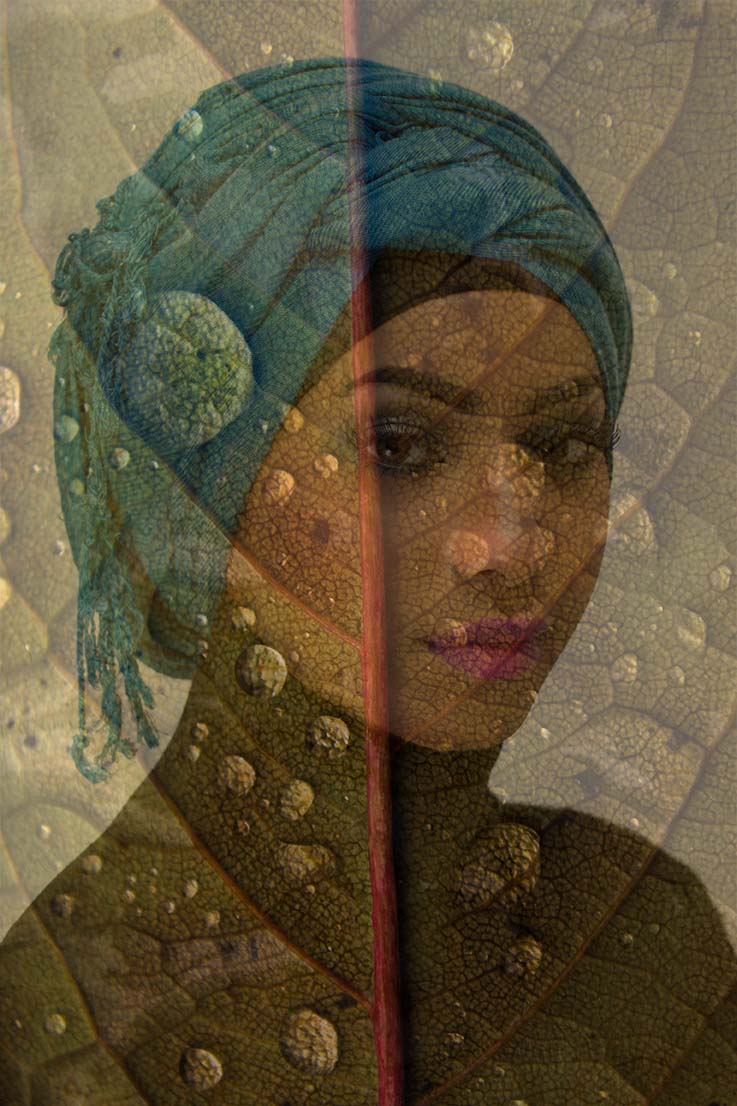
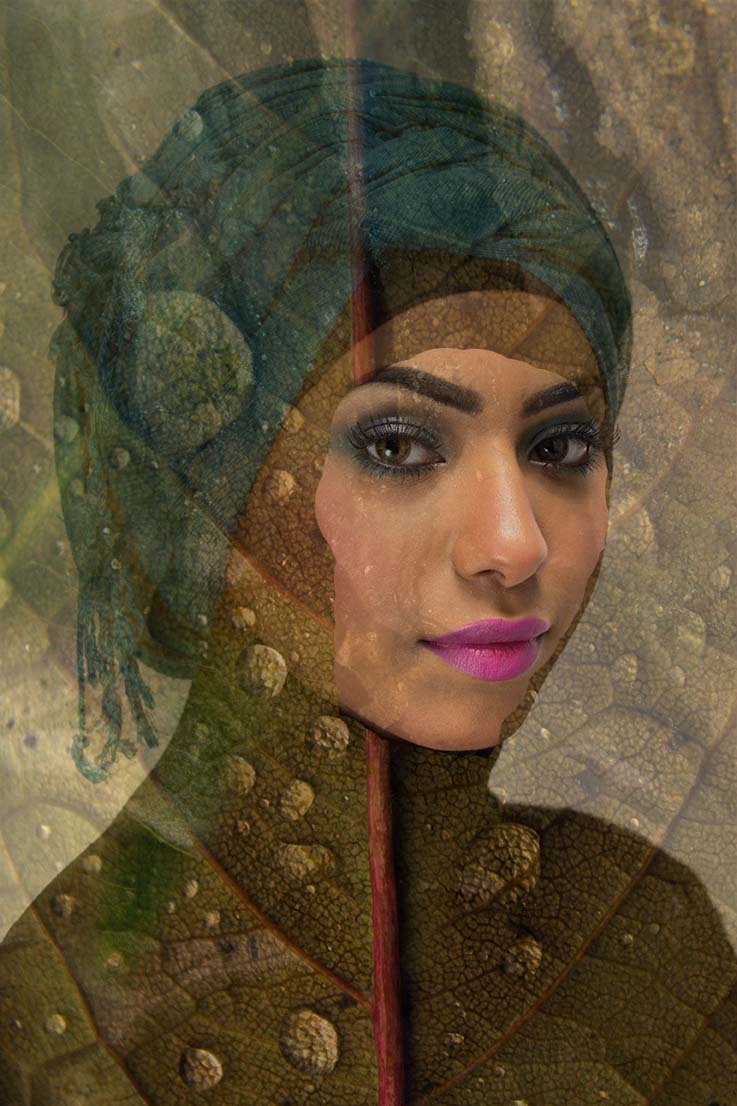
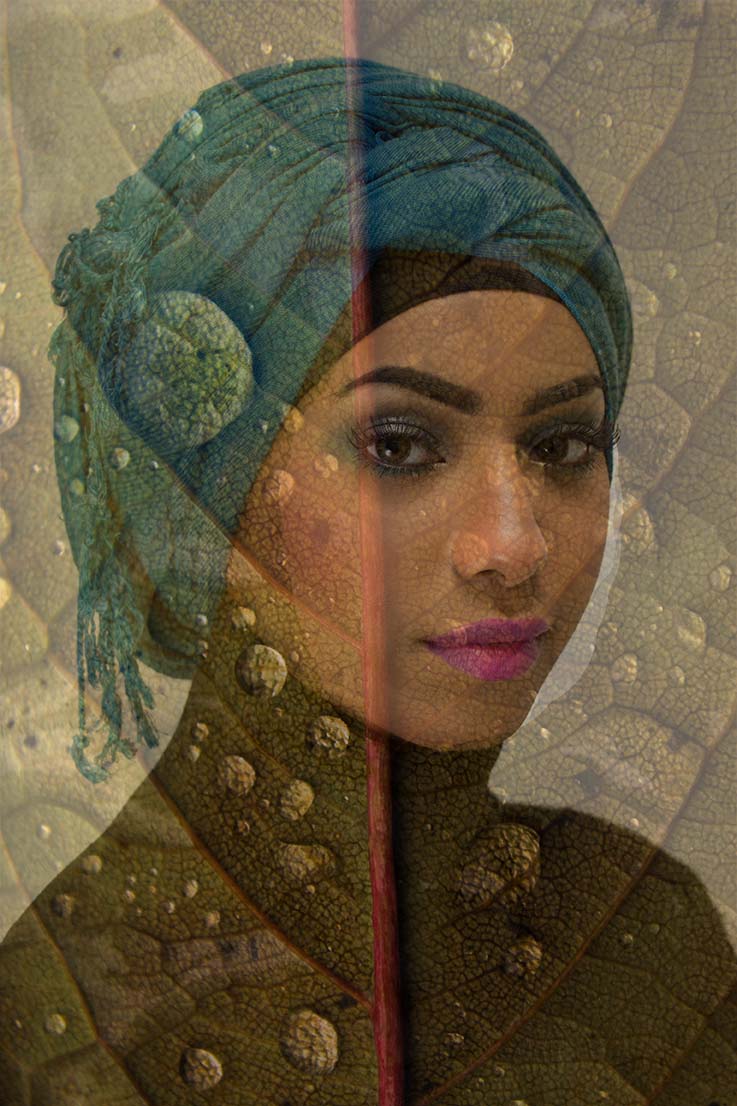
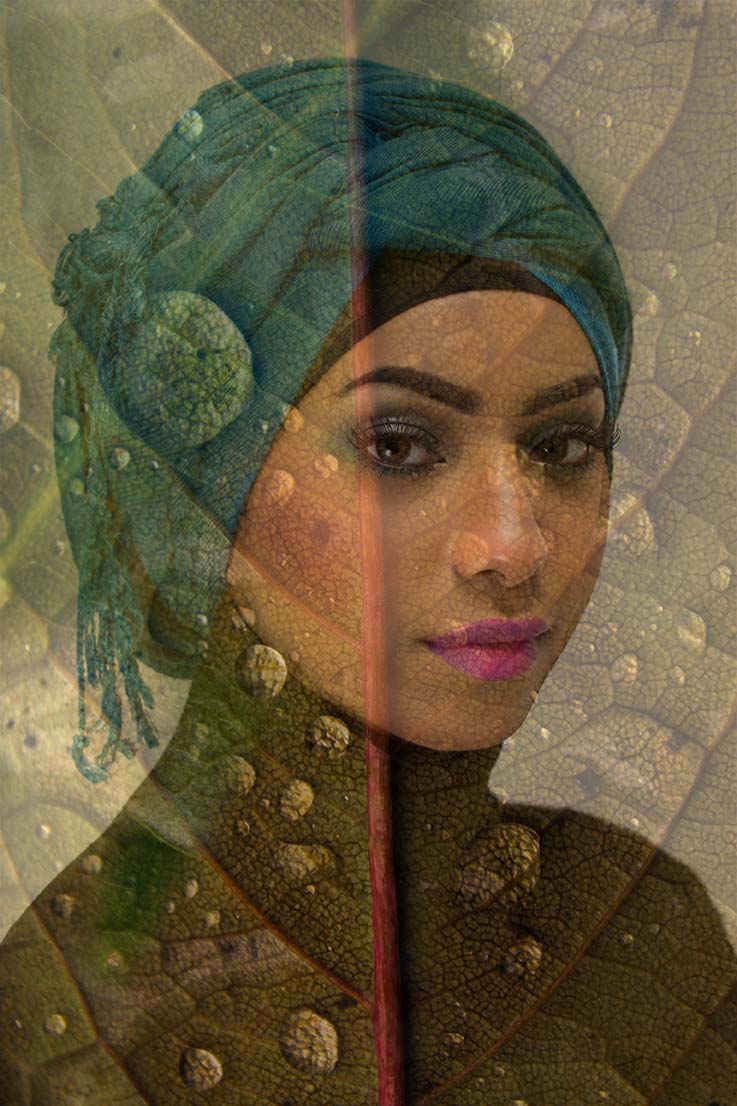
Soon after taking the portrait I went out to look for appropriate textures I could layer over the top of it, carrying with me the sage advise of John Kiely: "make sure the colours of the textures are within the same colour space" (I paraphrase). Below are my chosen textures (which were basically given the Vibrancy and Highlights treatment in ACR, for they were shot RAW).


In Photoshop, the first thing I did was ensure all the images that I wanted to blend together were the same size. For this reason I saved them all at 300dpi at full quality. In order to layer the images on top of one another in the simplest way possible, recorded the size of the portrait (3071 x 4608 pixels) and made sure my other pictures were the same size. I discovered this technique last summer when making some other collages for Level Two.

I knew I wanted the leaf with the water droplets on it as the main background, so stuck it on there and reduced the Opacity to 60%, which I know from previous experience is a nice level (below).


You can see that- once the leaf is layered onto the portrait- the face is covered. This is where the Eraser tool comes into play. I had to experiment quite a lot with this tool, for every time I layered a new image onto it, I had to erase parts of it to reveal the face again.

This shows the importance of reducing the opacity of the Eraser tool itself, lending me more scope. The eyes are quite evidently revealed here, but the 'blend' is too harsh. .


This is what I'm talking about: the transition where the eyes are is a lot more subtle, and on the road to becoming the finished product.

After the first leaf was in place, I added the second one, this time being more creative by using the Graduation tool to add more colour to the top left-hand corner. By selecting this tool and drawing a diagonal line from the top and working into the start of Bezma's head, I was able to then reduce the opacity, so it starts strong and becomes more subtle, so as not to interrupt the face the way the first leaf did (this stage below).

Doesn't look a great deal different with the Opacity lowered, but you may be able to nite more going on in the top left.

For the addition of the tree bark (whose brown fitted well with the different shades of green from the leaves), I rotated the image horizontally for a change, for I only wanted the part between the top of Bezma's head and the end of the canvas filling in slightly. I was able to do this by changing the arrangement of Photoshop's workspace to Float all in Windows (Window > Arrange > Float All in Windows), which I find absolutely essential when working with multiple images. Then I reduced the opacity again for this new layer.

This is how I came out with the finished image seen at the top of this post.


No comments:

Post a Comment